Are you looking to add logos to your product images, or maybe remove existing ones? In this
tutorial, I'll show you how to do both using Adobe Photoshop. Let's get started!
Step 1: Open Photoshop and create a new project.
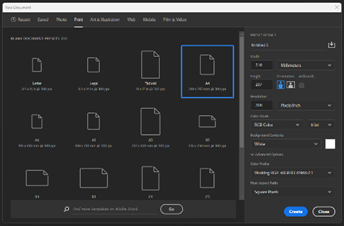
Open up Photoshop and create a new blank project. The canvas/project size doesn't matter as we'll be focusing on the product itself. Make sure you make it large enough to not lose quality. An A4 scale is an average starting point, but any size will work. This is the canvas we'll be working on.
Step 2: Load your images into the project
 In preparation for this tutorial, I've loaded a few images into my project. These are the products I'll be working on and the logos I'll be adding. If you haven't already, drag your images and logos to the Photoshop document. When you drag your files in you will need to confirm their placement before you can add another (click on the tick at the top or press enter on your keyboard to accept). Once your files are in, they will show up as individual layers on the right-hand side. You can click on the small box/eye icon next to the layer to make it visible or invisible.
To Note:
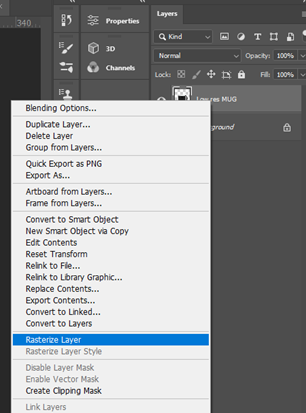
Take note of the layer you’re using,
if it has a small icon in the corner
of the small thumbnail in the
later panel, this indicates that
it’s a smart object. For this
method to work we need to
remove the smart object effect.
Right-click on the layer and
choose ‘Rasterize Layer’ to do this.
Example 1
Step 3: Choose a product to work on.
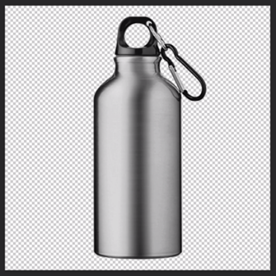
For my first example, I've chosen a silver bottle as it allows me to demonstrate how the added logos interact with the shadow and highlights of the bottle. I've also already removed the background from this product, which is something I'll demonstrate later on in this tutorial.
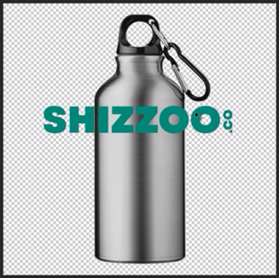
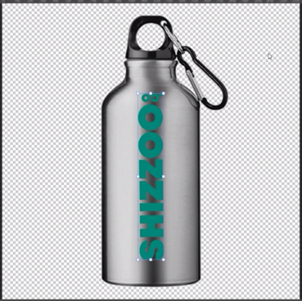
Step 4: Resize and rotate your logo to fit the product.
With your product and logo now visible in the document, resize and rotate your logo to fit the product. With the logo in an appropriate position, we can now move on to blending options.
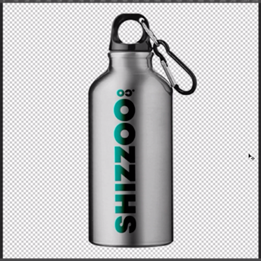
Step 5: Experiment with blending options.
Blending options can be found above the Layers panel. To figure out the best blending option for your project, make sure you've selected the layer you want to work on and hover your mouse over each of the options to see which blends into the layer below the best. And with that, I think this product is done.

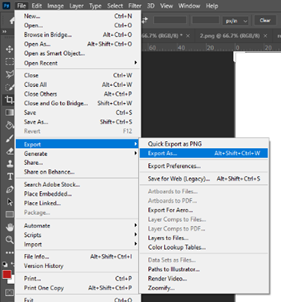
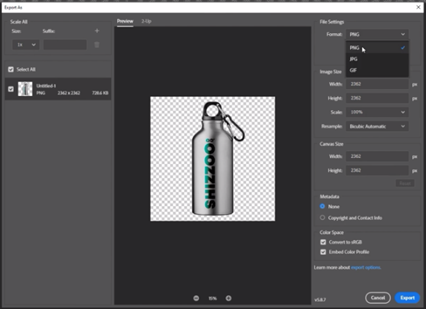
Step 6: Save your product image.
We're now going to save the product image. Go up to ‘File’ > ‘Export As’. If you have a transparent background, you can save this as a PNG and it will only save the bottle without any background. Or you can switch it to JPEG which will give it its white background no matter what. For now, though, I'm just going to cancel so we can move on to the next example.
Example 2
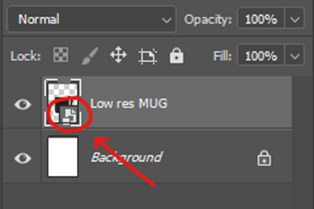
Step 1: Removing a Background and Rasterizing the layer
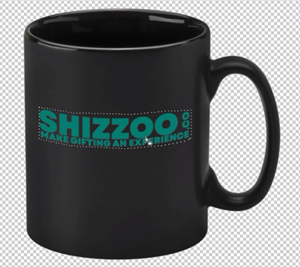
For this next example, we're going to work with a black mug and a white background. Unlike the previous example, we're going to remove the background from the product ourselves. First, take note that the layer for the black mug has a small icon indicating that it's a smart object. We need to remove the smart object effect to be able to edit it properly. Right-click on the layer and choose Rasterize Layer to do this. (Refer to the ‘To Note’ section for images)
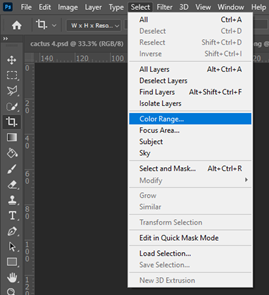
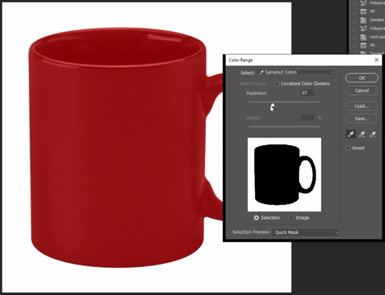
Step 2: Removing the Background.
Now that we have a rasterized layer, we can proceed with removing the background. To do this, go to ‘Select’ > ‘Colour Range’. Click on the background to select it. Make sure that the mug/object is completely black, and the background is completely white. If there are any grey or white areas,
they will also be selected. Once you click OK, the entire background will be selected. Press the Delete key to remove the background.
Step 3: Removing an Existing Logo.
Before we add a logo, let's first remove the existing logo on the mug. Select the ‘Lasso Tool’ from the toolbar on the left. Hold click to choose the Polygonal Lasso Tool and click or drag around the logo. Once you have completed the selection, press Shift and Delete to bring up the Fill popup box. Choose Content-Aware from the dropdown and click OK. If the result doesn't look quite right, you can repeat the process a few more times on the areas that aren’t quite right.


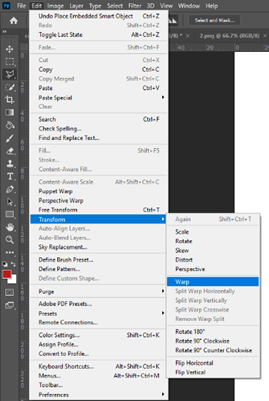
Step 4: Adding the Logo and using the Warp Tool.
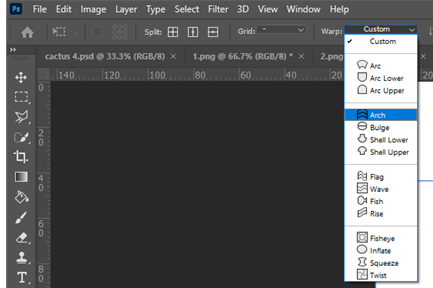
Now we can proceed with adding a new logo. Select the logo layer and resize it to fit the mug. Keep in mind that the mug has a curved shape, so we'll need to use the Warp tool to make the logo follow the contour of the mug. To do this, go to ‘Edit’ > ‘Transform’ > ‘Warp’. At the top of the screen, there is a drop-down menu where you can choose different warp options. For this example, we'll choose Arch.
Step 5b: Adjust the logo to match the mug's curvature.
Use the warp handle to drag the logo to the angle that works best for you. Make sure to adjust the logo to match the curvature of the mug. Once you're satisfied with the position, click the tick in the top right corner to confirm the change. Finally, check the blending options to see if any improvements can be made. In this case, the Normal blend mode works best, so we'll leave it at that.


And that's it! With these steps, you should be able to add and remove logos from products in Photoshop with ease. We have also created a video for listeners who would rather listen to how to remove logos from products which you can check out below!
Thanks for reading!